If you’re looking for ‘fancy’ up your garment, think about adding trim! Yes, I said it…T-R-I-M. Top stitching trim use to horrify me. I had a bad experience where my machine ate not only my trim but all of my fabric. Thinking of adding trim to anything for months, just did not sit right with me.
I finally got the courage to try again – with lace and trim.
I learned never to use the end of the trim at the beginning – your machine is bound to eat the trim and your fabric. Lay the trim about an inch or so off of the fabric. If you are adding trim to pockets or the hemline, you will want to begin by following the patterns designated hem suggestion. And have your supplies ready – of course!
You will want to place your pattern pieces according to the directions. You will align them appropriately and then follow the hem guidelines – but DO NOT hem yet; instead pin it in place. The next step we will do is pin the suggested hem (according to your pattern).
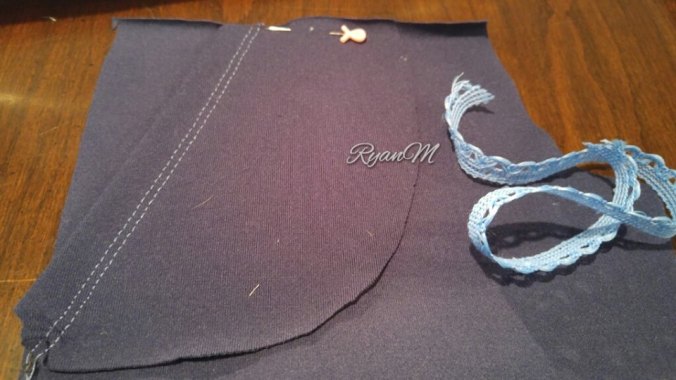
When adding trim or lace to a pocket or hem you will want to follow the hem for guidance. Here the hem is 3/8″ so I began by pinning the hem.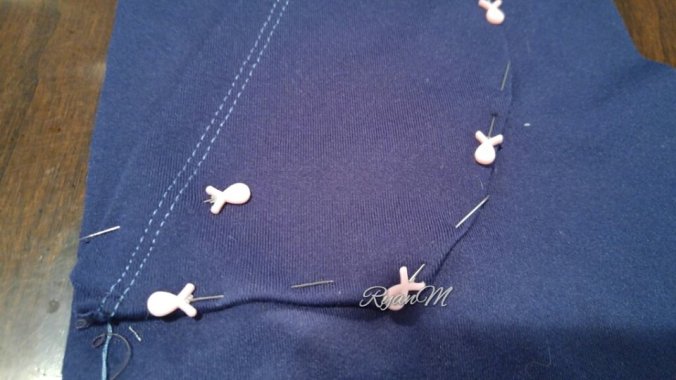
Next I wanted to integrate lace trim over top – so I first measured the length of the pocket, leaving a little extra over on each end. 
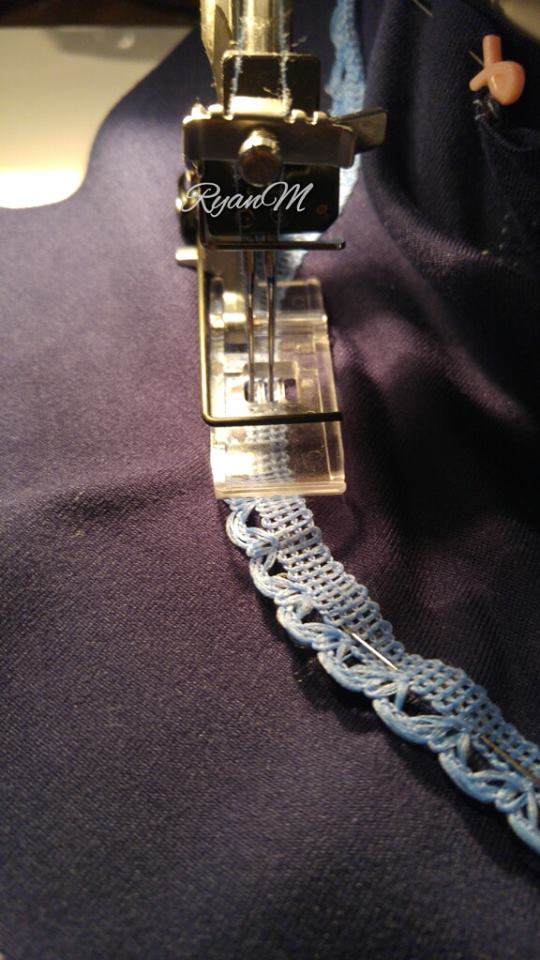
Then, I gently and carefully removed each pin (one at a time) and placed the trim on top. Your trim will be where you original hem/top stitching would have been. I carefully reinserted the pins ensuring that the 3/8″ hem was maintained. Remember to use your patterns suggested hem as a guidance.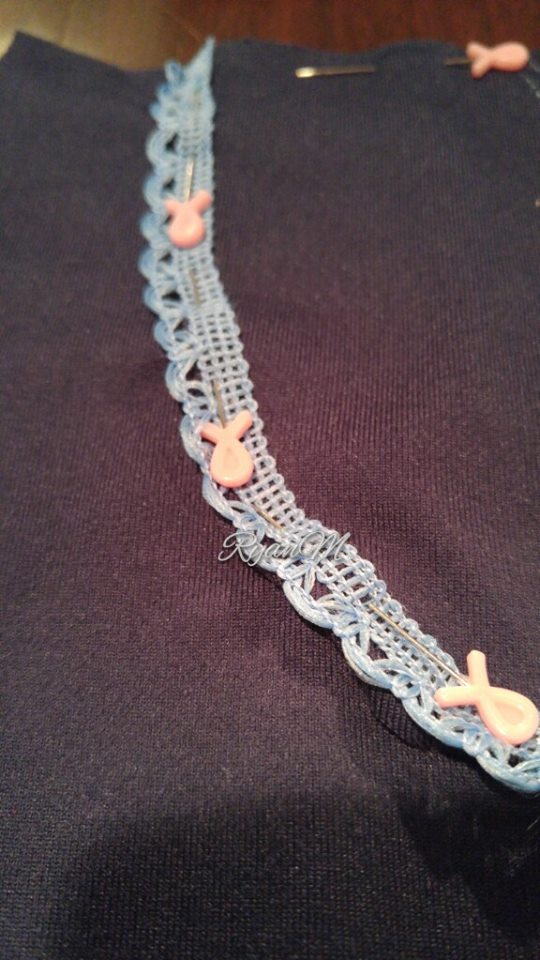
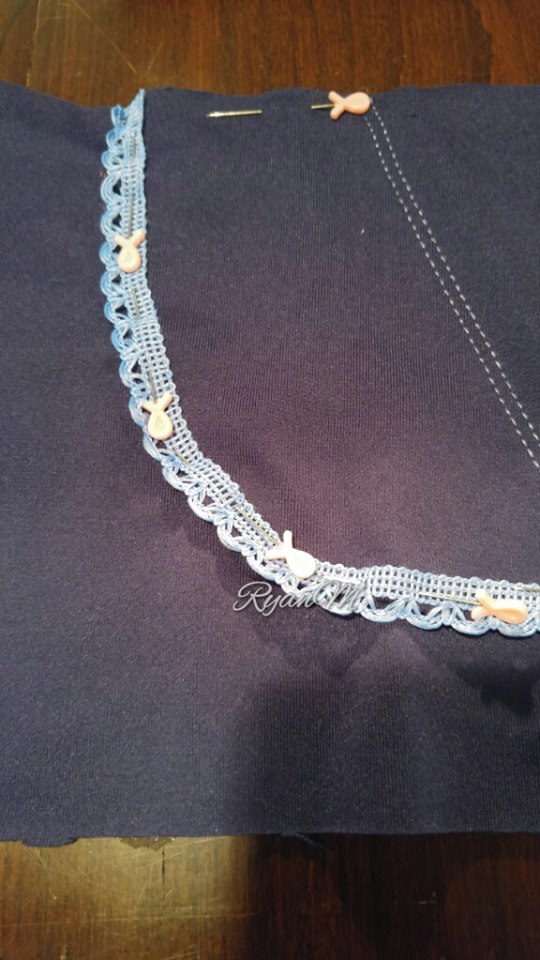
Topstitching was next….Remember to use the patterns suggested hem for guidance when top stitching – the trim will go where you are top stitching.
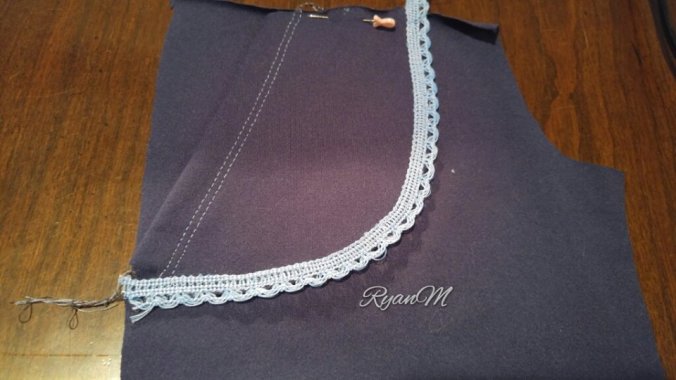
I also added trim to the hem of the bottom of the shorts – I would recommend doing the exact same steps for the pocket. Measure the hem suggested by the pattern for the bottom of the shorts, then pin it (but do not sew yet). Next, measure your opening using your trim or lace and add an extra inch or two. Carefully pin your trim to where you will be top stitching over the hem and prepare to top stitch. Make sure your trim overlaps and you will continue your top stitch for an additional 1 inch to ensure that it is sewn down.
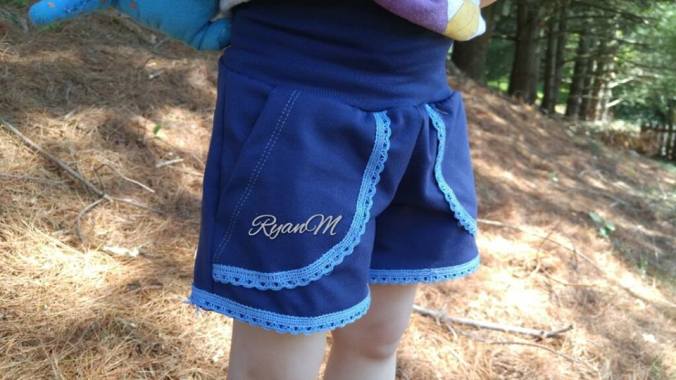
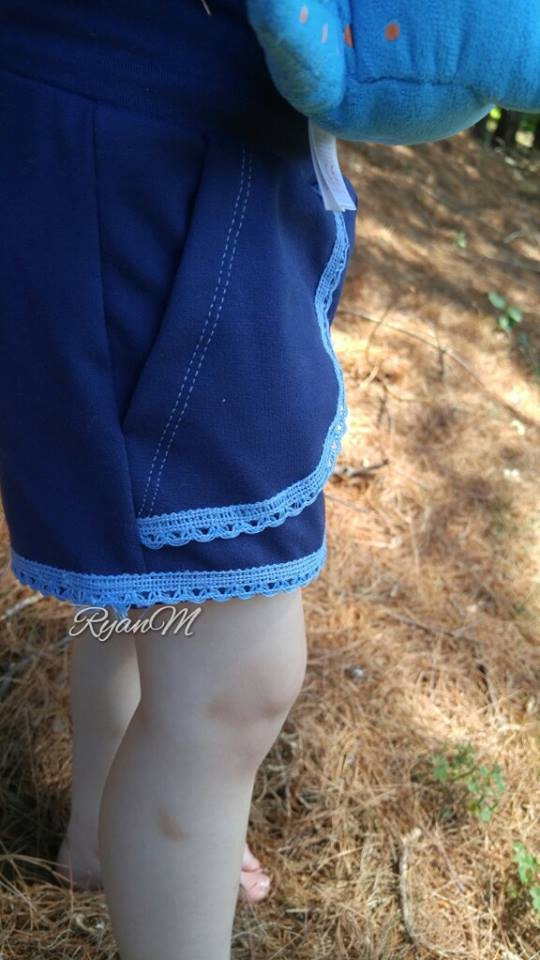
Here is a photo of the shorts I made to include trim to the pockets and the hem line of the shorts. I adore how they turned out! I used about 2 yards of trim for this project 🙂 Can’t wait to sew up more! But if you want to see more Trim Ideas – check out my friend’s blog post here.

Pattern Used: New Horizons Designs Girl’s Portlanders
Grab the Ladies Portlanders while you’re thinking about it….
Fabric from: Knitpop
Trim: Joann Fabrics
Want to see more inspirational photos of how to use trim? Click to see Sewing with Sarah’s inspirational photos.
Note: This post contains affiliate links. If you choose to purchase something using the links, a small portion of your purchase will get recycled into my sewing habit at no additional cost to you! Thank you for keeping my habit going.

Pingback: Summer and Shorts and Summer… – Stitching At Night
Pingback: Porlander Shorts for Women – Sewing with Sarah
Pingback: A Wardrobe Staple Jumper…. – Stitching At Night